
Table of Content
- What is ELISA?
- How Does ELISA Work: Principles and Core Components
- Types of ELISA
- Experimental Preparation
- Coating: Immobilizing the Capture Antibody
- Washing: Critical Removal of Unbound Reagents
- Blocking: Preventing Nonspecific Binding
- Antigen Incubation: Binding the Target to the Capture Antibody
- Detection Antibody Incubation: Specific Recognition and Signal Generation
- Substrate Development: Generating Detectable Signals
- Stop Reaction & Plate Reading: Finalize Your ELISA Data Accurately
- Conclusion
What is ELISA?
How Does ELISA Work: Principles and Core Components
In a typical ELISA setup:
- Immobilization: The target antigen is anchored to a solid surface, usually a microplate well.
- Antibody Binding: A primary antibody specific to the antigen binds to the target, forming an antigen-antibody complex.
- Signal Generation: A secondary antibody conjugated to a reporter enzyme (e.g., horseradish peroxidase, alkaline phosphatase) is added. This antibody binds to the primary antibody or directly to the antigen (depending on the ELISA type).
- Detection: A colorless substrate is introduced, which the enzyme converts into a colored product. The color intensity correlates with the amount of antigen present, allowing quantification via a spectrophotometer.
Core Elements and Detection Methods of ELISA
While ELISA encompasses diverse formats (e.g., direct, indirect, competitive, and sandwich assays), all variants rely on four fundamental steps to ensure accurate detection and quantification of target molecules:
- Antigen Immobilization (Coating):
The target antigen is immobilized onto the surface of a microplate well, either directly or via a capture antibody. This step ensures precise anchoring of the analyte for subsequent interactions. - Plate Blocking:
Unoccupied binding sites on the microplate are “blocked” using inert proteins (e.g., bovine serum albumin) or other blocking agents. Blocking minimizes non-specific binding of antibodies or other reagents, reducing background noise. - Target Detection (Probing):
Specific antibodies, often conjugated with enzyme labels (e.g., horseradish peroxidase (HRP) or alkaline phosphatase (AP)), are introduced to bind selectively to the immobilized antigen. In sandwich ELISA, a matched antibody pair (capture and detection) enhances specificity by targeting distinct epitopes. - Signal Generation and Measurement:
A substrate compatible with the enzyme label is added. Enzymatic conversion of the substrate produces a detectable signal—colorimetric, fluorescent, or chemiluminescent—proportional to the antigen concentration. Signal intensity is quantified using specialized instruments (spectrophotometers, fluorometers, or luminometers).
Key Considerations for Optimal Detection:
- Enzyme-Substrate Compatibility: HRP and AP are widely used due to their high catalytic activity and commercial availability of diverse substrates. Substrate choice depends on assay sensitivity requirements and detection equipment. For example, chromogenic substrates (e.g., TMB for HRP) are ideal for visible colorimetric readouts, while chemiluminescent substrates offer higher sensitivity for low-abundance targets.
- Reagent Validation: High-affinity antibodies and rigorously optimized buffers are critical to minimize cross-reactivity and ensure reproducibility.
By adhering to these core principles, ELISA achieves remarkable versatility, enabling applications ranging from clinical diagnostics to biomedical research.
Types of ELISA
Direct ELISA
In direct ELISA, the antigen is immobilized directly onto the assay plate, and a primary antibody conjugated with a reporter enzyme (e.g., horseradish peroxidase or alkaline phosphatase) binds specifically to the antigen. This format eliminates the need for secondary antibodies, streamlining the procedure. However, direct detection has limited sensitivity due to the absence of signal amplification. Additionally, labeling primary antibodies for each assay system is time-consuming and costly, restricting flexibility in experimental design.

Indirect ELISA
Indirect ELISA employs an unlabeled primary antibody for antigen recognition, followed by a labeled secondary antibody that binds to the primary antibody. This method enhances sensitivity through signal amplification, as multiple secondary antibodies can attach to a single primary antibody. Indirect detection also offers versatility, as the same labeled secondary antibody can be used with various primary antibodies derived from the same host species. However, cross-reactivity of the secondary antibody may introduce nonspecific signals, requiring careful optimization.

Sandwich ELISA
The sandwich ELISA is the most sensitive and specific format, widely utilized for detecting low-abundance antigens in complex samples. This method employs two primary antibodies that recognize distinct epitopes on the target antigen: a capture antibody immobilized on the plate and a detection antibody labeled with a reporter enzyme or tag. The antigen is “sandwiched” between these two antibodies, ensuring high specificity.

Key Features of Sandwich ELISA
- Capture Phase: The assay begins by coating the plate with a capture antibody specific to the target antigen. After blocking nonspecific binding sites, the sample containing the antigen is added. The antigen binds exclusively to the capture antibody, enabling precise immobilization even in impure samples.
- Detection Phase: A detection antibody, often conjugated with an enzyme or biotin (for subsequent streptavidin-enzyme binding), is introduced. This antibody targets a different epitope on the antigen, forming the “sandwich” complex.
- Signal Amplification: In indirect sandwich ELISA, a labeled secondary antibody specific to the detection antibody further amplifies the signal, enhancing sensitivity.
Advantages
- High Sensitivity and Specificity: Dual antibody targeting minimizes cross-reactivity and background noise.
- Broad Applicability: Suitable for complex samples (e.g., serum, cell lysates) where antigen purity is low.
- Flexible Detection: Compatible with various detection methods (colorimetric, chemiluminescent, or fluorescent).
Disadvantages
- Antibody Pairing Requirement: The capture and detection antibodies must bind non-overlapping epitopes, necessitating rigorous optimization.
- Cross-Reactivity Risks: Secondary antibodies must exhibit specificity for the detection antibody (not the capture antibody). This is typically addressed by using antibodies from different host species (e.g., mouse IgG for capture and rabbit IgG for detection).
- Complex Workflow: Additional steps, such as plate coating and blocking, prolong the assay timeline.
Experimental Preparation
1. Reagents and Materials
- Capture Antibody: A high-affinity primary antibody specific to the target antigen, diluted in coating buffer (e.g., 0.05 M carbonate-bicarbonate buffer, pH 9.6).
- Detection Antibody: A labeled primary antibody (direct method) or unlabeled primary antibody (indirect method) targeting a distinct epitope of the antigen. For indirect detection, an enzyme-conjugated secondary antibody (e.g., HRP- or AP-labeled) compatible with the host species of the detection antibody is required.
- Antigen Standards: Purified antigen serially diluted in sample dilution buffer (e.g., PBS with 1% BSA) to generate a calibration curve.
- Buffers:
- Blocking Buffer: PBS containing 1–5% BSA or non-fat dry milk to prevent nonspecific binding.
- Wash Buffer (PBST): PBS with 0.05–0.1% Tween-20 for plate washing.
- Substrate: Chromogenic (e.g., TMB for HRP, PNPP for AP), fluorogenic, or chemiluminescent substrates matched to the enzyme label.
- Stop Solution: Acid (e.g., 1 M H₂SO₄ for TMB) or alkaline (e.g., 3 M NaOH for PNPP) to terminate reactions.
- Equipment: High-binding polystyrene 96-well platesHigh-binding polystyrene 96-well plates, multichannel pipettes, microplate reader, and sealing films.
2. Antibody Pair Validation
- Confirm that the capture and detection antibodies bind to non-overlapping epitopes on the antigen to avoid steric hindrance. This is verified through preliminary experiments (e.g., checkerboard titration).
- Ensure species compatibility: Capture and detection antibodies should be derived from different host species (e.g., mouse and rabbit) to prevent cross-reactivity of secondary antibodies in indirect assays.
3. Standard and Sample Preparation
- Prepare antigen standards in a concentration gradient (e.g., 0–1000 pg/mL) using a matrix resembling the test samples (e.g., serum or cell culture medium).
- Clarify complex biological samples (e.g., serum, tissue lysates) by centrifugation to remove particulates that may interfere with binding.
4. Critical Pre-Assay Steps
- Plate Coating Optimization: Determine the optimal capture antibody concentration and coating duration (typically 1–10 μg/mL, 4°C overnight or 37°C for 2 hours).
- Blocking Efficiency: Test blocking buffers to minimize background noise, ensuring complete coverage of unbound sites on the plate.
Coating: Immobilizing the Capture Antibody
Antibody Dilution:
- Dilute the capture antibody to the recommended working concentration (typically 1–10 µg/mL) in a suitable coating buffer. For Mabtech’s ELISA Flex kits, a concentration of 2 µg/mL in PBS (pH 7.4) is standard.
- Note: ELISpot protocols often require higher antibody concentrations due to the larger binding surface of PVDF membranes. ELISA plates, however, utilize high-binding polystyrene with optimized protein adsorption, necessitating lower antibody loads.
Plate Coating:
- Add 100 µL of the diluted capture antibody to each well of a high-binding, flat-bottom polystyrene ELISA plate.
- Cover the plate with a sealing film to prevent evaporation and contamination.
Incubation:
- Incubate the plate overnight (12–16 hours) at 4–8°C to maximize antibody adsorption. For shorter workflows, a 2-hour incubation at 37°C can be used, though overnight coating generally enhances binding efficiency.
Key Considerations
Plate Selection
- Use high-binding polystyrene plates designed for ELISA. These plates leverage hydrophobic interactions to immobilize proteins like antibodies effectively.
- Avoid using these plates for preparing protein solutions (e.g., antibodies or standards), as unintended adsorption may deplete critical reagents.
Buffer and pH Optimization
- While PBS (pH 7.4) is commonly used, coating buffers with slightly alkaline pH (e.g., carbonate-bicarbonate buffer, pH 9.6) may enhance antibody binding in some cases.
- If inconsistent results occur, evaluate plates from different manufacturers, as plastic composition can subtly influence binding kinetics.
Avoiding Pitfalls
- Bubbles: Ensure no bubbles are introduced during pipetting, as they disrupt uniform coating.
Edge Effects: Place the plate on a level surface during incubation to prevent uneven antibody distribution.
Pre-Coated Plates: A Time-Saving Alternative
For laboratories prioritizing efficiency and reproducibility, pre-coated ELISA plates eliminate the need for manual coating. These plates are robotically coated under controlled conditions, offering:
- One-Day Workflow: Begin experiments immediately by adding samples.
- Enhanced Reproducibility: Minimize human error in pipetting and coating consistency.
- Strip Plate Handling: If using pre-coated strip plates, label strips with a waterproof pen before use to avoid misidentification.
Washing: Critical Removal of Unbound Reagents
Wash Buffer Preparation:
Prepare PBS containing 0.05–0.1% Tween 20 (PBST). The detergent Tween 20 reduces hydrophobic interactions between residual proteins and the plate surface.
Washing Protocol:
Volume: Add 300 µL of PBST per well to ensure complete coverage and removal of loosely bound molecules.
- Frequency: Wash 3–5 times after each incubation step (e.g., post-coating, post-blocking, post-antigen/detection antibody incubation).
- Method:
- Automated Washer: Programmed for consistent aspiration and dispensing.
- Manual Washing: Use a multichannel pipette or handheld manifold. Tilt the plate at a 45° angle during aspiration to avoid touching the coated surface.
Post-Wash Handling:
Tap the plate firmly onto absorbent paper to remove residual liquid.
Critical Note: Proceed immediately to the next step to prevent wells from drying, as dried plates may increase nonspecific binding.
Key Considerations
Detergent Optimization
- Tween 20 Concentration:
-
- 0.05% Tween 20 is standard, but higher concentrations (up to 0.1%) may improve washing efficiency for sticky antigens or antibodies.
- Avoid excessive Tween 20, as it may strip weakly bound capture antibodies.
Wash Volume and Repetitions
- Excess Volume (300 µL): Ensures thorough rinsing of well walls, where residual reagents often accumulate.
- Multiple Washes: At least 3 washes are required, but stubborn interactions (e.g., high-affinity antigens) may necessitate 5 washes.
Automated vs. Manual Washing
- Automated Washers: Provide uniformity and reduce human error, ideal for high-throughput workflows.
- Manual Washing: Requires careful technique to avoid cross-contamination or uneven aspiration.
Common Pitfalls and Solutions
- Incomplete Aspiration: Residual liquid traps unbound reagents → Ensure complete fluid removal by tilting the plate and using fresh absorbent paper.
- Dried Wells: Increases background → Always proceed to the next step immediately after washing.
- Cross-Contamination: Reuse of tips or splashing between wells → Use fresh tips for each reagent and avoid overfilling wells.
Blocking: Preventing Nonspecific Binding
Blocking Buffer Preparation:
Prepare a blocking solution containing 1–5% BSA (or non-fat dry milk) in PBS.
Optional: Add 0.05% Tween 20 to enhance blocking efficiency, though this is more commonly reserved for wash buffers (see Deviation Note below).
Blocking Protocol:
Add 200 µL of blocking buffer per well to fully cover the plate surface.
Incubate at room temperature for 1–2 hours (or 37°C for 1 hour).
Post-Blocking Wash:
Wash the plate 3 times with PBST (PBS + 0.05% Tween 20) to remove excess blocking agents.
Key Considerations
- BSA vs. Non-Fat Milk: BSA is preferred for phosphorylated or biotinylated targets, as milk contains endogenous biotin and phosphatases.
- Volume: A larger volume (200 µL) ensures complete coverage of the plate’s hydrophobic surface.
Antigen Incubation: Binding the Target to the Capture Antibody
Antigen Sample Preparation
Standard Curve Preparation:
- Reconstitute lyophilized antigen standards (if applicable) in a matrix resembling the test samples (e.g., PBS with 1% BSA for serum-free samples or diluted serum for biological fluids).
- Prepare a serial dilution series (e.g., 1000, 500, 250, 125, 62.5, 31.25, 0 pg/mL) using fresh dilution buffer.
- Critical Note: Vortex or pipette-mix each dilution thoroughly to ensure homogeneity.
Test Sample Preparation:
- For biological samples (e.g., serum, plasma, or cell culture supernatant), centrifuge at 10,000 × g for 10 minutes to remove debris.
- Dilute samples in assay buffer (e.g., PBS with 1% BSA) to fall within the dynamic range of the standard curve. Typical dilution factors range from 1:2 to 1:100, depending on antigen abundance.
- Pro Tip: Perform a preliminary dilution test to estimate the optimal dilution factor for unknown samples.
Incubation Protocol:
Add 100 µL of prepared standards or samples to each well.
Seal the plate to prevent evaporation and incubate at 37°C for 2 hours (or 4°C overnight for increased sensitivity).
Negative Control: Include wells with dilution buffer only (no antigen).
Post-Incubation Wash:
Wash the plate 3–5 times with PBST to remove unbound antigens and matrix contaminants.
Key Considerations
Matrix Effects:
- Dilute samples in a buffer matching the standard curve matrix to minimize interference (e.g., serum proteins or lipids can nonspecifically bind to the plate or antibodies).
- For complex matrices (e.g., serum), use heterophilic blocking reagents (e.g., normal IgG) to reduce false positives.
Antigen Stability:
- Avoid repeated freeze-thaw cycles of antigen standards or samples, which can degrade proteins. Aliquot and store at -80°C for long-term use.
Edge Effects:
- Place the plate on a level, vibration-free surface during incubation to ensure uniform binding.

Detection Antibody Incubation: Specific Recognition and Signal Generation
Detection Antibody Preparation
Direct Detection:
- Dilute the enzyme-conjugated primary antibody (e.g., HRP- or AP-labeled) to the optimal working concentration (typically 0.5–2 µg/mL) in blocking buffer (e.g., PBS with 1% BSA).
Indirect Detection:
- Dilute an unlabeled primary antibody (detection antibody) in blocking buffer (same concentration range).
- Prepare a species-specific, enzyme-conjugated secondary antibody (e.g., anti-rabbit HRP) diluted per manufacturer’s guidelines (commonly 1:5,000–1:20,000).
Incubation Protocol:
Add 100 µL of the diluted detection antibody to each well.
For indirect detection:
- Incubate the primary antibody at 37°C for 1–2 hours, followed by 3–5 PBST washes.
- Add the enzyme-conjugated secondary antibody and incubate at 37°C for 1 hour.
For direct detection:
- Incubate the labeled primary antibody at 37°C for 2 hours.
Seal the plate to prevent evaporation.
Post-Incubation Wash:
Wash the plate 3–5 times with PBST to remove unbound antibodies.
Key Considerations
Antibody Specificity:
- Ensure the detection antibody recognizes an epitope distinct from the capture antibody to avoid steric hindrance.
- For indirect assays, use secondary antibodies cross-adsorbed against the capture antibody’s host species (e.g., if capture antibody is mouse IgG, use anti-rabbit secondary antibody for detection).
Signal Amplification (Indirect Method):
- Secondary antibodies bind multiple epitopes on the primary antibody, amplifying the signal.
- Biotin-streptavidin systems (e.g., biotinylated primary antibody + streptavidin-HRP) further enhance sensitivity.
Background Control:
- Include no-antigen control wells to assess nonspecific binding of the detection antibody.
Substrate Development: Generating Detectable Signals
The substrate development step converts the enzymatic activity of the detection system into a measurable signal, enabling quantification of the captured antigen. This step requires precise timing and handling to ensure accuracy and reproducibility.
Developing the ELISA Signal
1. Prepare Substrate Solutions for Optimal Reactivity
- Prepare the substrate solution immediately before use, following manufacturer instructions. Common substrates include:
-
Colorimetric:
-
TMB (3,3′,5,5′-Tetramethylbenzidine) for HRP: Turns blue upon reaction, stops to yellow with acid (e.g., 1 M H₂SO₄).
-
PNPP (p-Nitrophenyl Phosphate) for AP: Generates a yellow product, stopped with NaOH.
-
-
Chemiluminescent: Luminol-based substrates (e.g., SuperSignal™) for HRP/AP emit light upon reaction, detected by a luminometer.
-
Fluorogenic: Quenched substrates (e.g., Attophos™ for AP) release fluorescence upon enzymatic cleavage.
-
2. Initiate the Enzymatic Reaction
-
Add 100 µL of substrate solution to each well.
-
Incubate at room temperature, protected from light, for a standardized duration (e.g., 10–30 minutes for TMB; 5–60 minutes for chemiluminescent substrates).
3. Stop the Reaction for Colorimetric Assays
-
Add 50–100 µL of stop solution (e.g., 1 M H₂SO₄ for TMB) to each well.
-
Gently tap the plate to mix, ensuring uniform color transition (e.g., blue → yellow for TMB).
4. Capture the Signal for Quantification
-
Colorimetric: Read absorbance immediately at the appropriate wavelength (e.g., 450 nm for TMB, 405 nm for PNPP).
-
Chemiluminescent/Fluorescent: Measure light emission or fluorescence intensity within the substrate’s optimal time window.
Tips to Optimize Signal-to-Noise Ratio
Control Timing for Consistency
-
Maintain identical incubation times across all wells to avoid signal variability.
-
For kinetic assays (e.g., continuous absorbance monitoring), establish a fixed endpoint.
Preserve Substrate Integrity
-
Protect light-sensitive substrates (e.g., TMB, chemiluminescent reagents) from exposure.
-
Avoid freeze-thaw cycles; aliquot and store substrates as recommended.
Validate Enzyme-Substrate Compatibility
- Confirm that the substrate matches the conjugated enzyme (HRP or AP).
Post-Incubation Wash:
Wash the plate 3–5 times with PBST to remove unbound antibodies.
Key Considerations
Antibody Specificity:
- Ensure the detection antibody recognizes an epitope distinct from the capture antibody to avoid steric hindrance.
- For indirect assays, use secondary antibodies cross-adsorbed against the capture antibody’s host species (e.g., if capture antibody is mouse IgG, use anti-rabbit secondary antibody for detection).
Signal Amplification (Indirect Method):
- Secondary antibodies bind multiple epitopes on the primary antibody, amplifying the signal.
- Biotin-streptavidin systems (e.g., biotinylated primary antibody + streptavidin-HRP) further enhance sensitivity.
Background Control:
- Include no-antigen control wells to assess nonspecific binding of the detection antibody.
Stop Reaction & Plate Reading: Finalize Your ELISA Data Accurately
Stopping the Reaction
1. Add Stop Solution for Colorimetric Assays
- TMB (HRP systems): Add 50–100 µL of 1 M H₂SO₄ per well. Watch for the color shift from blue to yellow.
- PNPP (AP systems): Use 1 M NaOH to halt the reaction, stabilizing the yellow product.
- Act fast: Read absorbance within 10 minutes to prevent signal drift.
2. Skip the Stop for Chemi/Fluorescent Assays
- Chemiluminescent (e.g., luminol) or fluorescent (e.g., Attophos™) substrates require immediate plate reading within their optimal signal window (5–30 mins).
Reading the Plate
1. Prep the Plate for Measurement
-
Wipe the plate bottom with a lint-free cloth to remove debris.
-
For strip plates, ensure strips are fully seated to avoid misalignment.
2. Choose the Right Detection Mode
-
Colorimetric: Measure absorbance at 450 nm (TMB) or 405 nm (PNPP). Use a reference filter (e.g., 570 nm) for background subtraction.
-
Chemiluminescent: Quantify light emission (RLUs) with a luminometer; integrate readings over 100–500 ms/well.
-
Fluorescent: Set excitation/emission wavelengths (e.g., 360/450 nm for AP substrates).
3 Tips to Avoid Common ELISA Reading Errors
Control Timing
- Chemiluminescent signals decay rapidly—read plates within 15 minutes of adding substrate.
- For colorimetric assays, standardize the delay between stopping and reading.
Prevent Signal Saturation
- Keep absorbance values below 2.5 OD (linear range of most readers). Dilute over-range samples if needed.
Subtract Background Religiously
- Deduct blank well values (no analyte) from sample readings to minimize noise.
Conclusion
Mastering the sandwich ELISA technique hinges on meticulous execution at every stage—from antibody immobilization to precise signal measurement. By optimizing each step, you ensure reliable, reproducible results for diagnostics, research, or quality control.
When selecting tools to support your assays, GenFollower’s 96-well ELISA plates stand out for their versatility and quality. Featuring detachable 8-well strips, these plates offer medium-binding and high-binding options to accommodate diverse targets. GenFollower’s plates ensure compatibility with automated systems and deliver uniform well thickness for consistent, error-free readings.
Whether you’re analyzing complex clinical samples or refining research protocols, GenFollower’s ELISA plates provide the precision and reliability needed to elevate your data—every time.
Recent Posts

Why use filter pipette tips? A Comprehensive Guide to Filter Pipette Tips
In laboratory workflows, unseen threats like aerosol contamination, residual liquid carryover, and cross-contamination can silently sabotage experimental results. This is where filter pipette tips step in—not just as disposable tools for liquid handling, but [...]
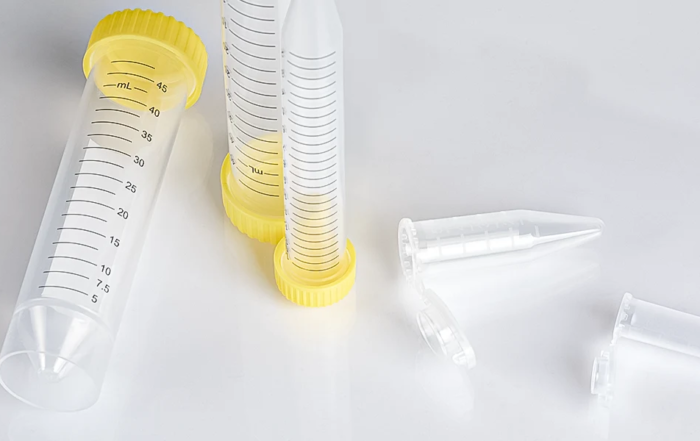
The Comprehensive Guide to Centrifuge Tubes
Centrifuge tubes are indispensable tools in modern laboratories, enabling the separation of samples by density through high-speed spinning. Widely used in scientific research, medical diagnostics, and industrial processes, these tubes play a critical role [...]
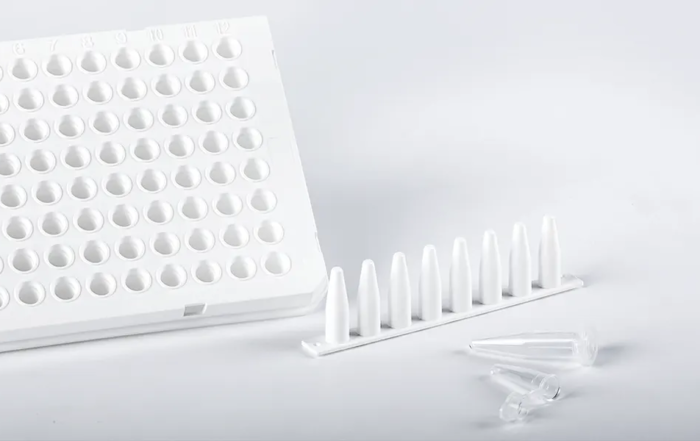
PCR Tubes vs. Strips vs. Plates: How to Choose the Right Format for Experiment’s Throughput & Accuracy
Have you ever faced inconsistent PCR results due to poor sealing, or wasted hours manually handling single tubes in high-throughput workflows? These challenges not only delay your experiments but can also compromise data accuracy. A [...]